
When faced with the challenges of installing temporary fencing on uneven ground, the right knowledge can make all the difference in ensuring a stable and effective setup. Here are key insights to guide you through the process.
What You Will Learn
- Understanding terrain challenges is crucial for a secure fencing installation.
- Choosing the right fencing style—stepped, racked, or contoured—affects both functionality and appearance.
- Soil conditions (clay, sandy, rocky) can significantly impact the stability of your fencing.
- Essential tools, such as post hole diggers and levels, are vital for a smooth installation process.
- Different materials like wood, metal, and wire mesh each have unique pros and cons based on ground conditions.
- Familiarizing yourself with local regulations and obtaining necessary permits is critical for compliance and safety.
Key Considerations for Temporary Fencing on Challenging Terrain
When installing temporary fencing on slopes and uneven ground, several factors come into play. This visual details the challenges, suitable fencing styles, and critical ground conditions to consider for a secure setup.
Challenges on Slopes
- 1 Stability: Prone to tipping/shifting
- 2 Alignment Issues: Gaps/overlaps
- 3 Soil Erosion: Affects long-term stability
Fencing Styles for Slopes
- A Stepped Fencing: Adjusts panel heights, less uniform look.
- B Racked Fencing: Panels follow contour, consistent height.
- C Contoured Fencing: Custom fits slope, seamless appearance.
Ground Conditions
- i Clay Soil: Retains water, causes instability.
- ii Sandy Soil: Prone to erosion, poor post hold.
- iii Rocky Terrain: Requires specialized tools for anchoring.
Key Takeaways
- ✓ Thorough terrain assessments.
- ✓ Material selection based on ground.
- ✓ Meticulous installation techniques.
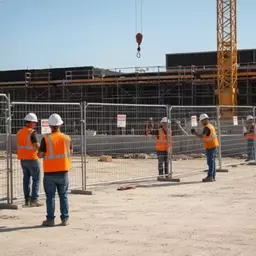
Understanding Temporary Fencing for Slopes and Uneven Ground
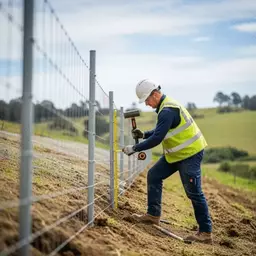
When it comes to installing temporary fencing on slopes and uneven ground, you might encounter a variety of challenges. These unique obstacles can significantly impact the stability and effectiveness of your fencing. Factors like alignment issues and the risk of tipping are common, and they necessitate a thoughtful approach. At Temporary Fencing Hub, we believe understanding these challenges is the first step toward achieving a secure setup!
With over a decade of experience in temporary fencing solutions, I can assure you that addressing these considerations early on can save you a lot of time and stress during installation. Let's dive into what makes slopes so tricky for fencing!
What Makes Slopes and Uneven Ground Challenging for Fencing?
Installing fencing on inclines or uneven terrain presents several challenges you should be aware of. Here are some key factors to consider:
- Stability: Fences installed on sloped ground may be prone to tipping or shifting, especially during windy conditions.
- Alignment Issues: Achieving a straight fence line can be difficult, leading to gaps or overlaps that compromise the structure.
- Soil Erosion: Slopes can experience erosion, which may affect the fence's stability over time. For more information on managing soil erosion, you can refer to resources such as the EPA's Best Management Practices for Silt Fences.
By recognizing these obstacles, you can better prepare and select the appropriate fencing solutions for your needs. At Temporary Fencing Hub, we’re here to guide you through this process!
The Importance of Choosing the Right Fencing Style
The fencing style you select plays a crucial role in ensuring successful installation on slopes. Here are a few methods to consider:
- Stepped Fencing: This involves adjusting the height of the panels to match the slope. It's effective but may look less uniform.
- Racked Fencing: This type allows panels to follow the contour of the slope, maintaining a consistent height across the fence.
- Contoured Fencing: This method involves customizing panels to fit the slope’s shape, which can create a seamless appearance.
Choosing the right style not only impacts the aesthetic but also the functionality of your fencing. It’s essential to assess your site conditions and determine which method aligns with your project requirements!
Understanding Ground Conditions and Their Impact on Fencing
The type of soil and overall ground conditions can greatly influence the stability of your temporary fencing. Let's look at some common ground types:
- Clay Soil: This soil tends to retain water, leading to instability and potential shifting.
- Sandy Soil: While easy to dig, sandy soil is prone to erosion and may not hold posts securely.
- Rocky Terrain: Installing fencing here requires additional tools and techniques to ensure proper anchoring. For detailed guidance on proper installation techniques in various terrains, consider consulting resources like the USDA Forest Service's Fences Handbook.
Understanding these ground conditions is vital for making informed decisions about the materials and installation techniques you’ll use. With the right approach, you can ensure your temporary fencing remains secure and effective on any landscape!
Essential Tools and Materials for Successful Installation
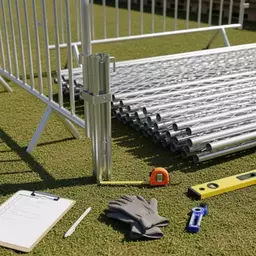
Must-Have Tools for Installing Temporary Fencing
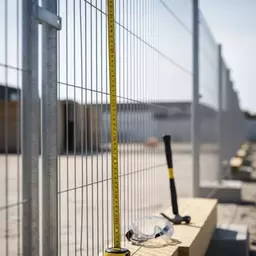
Equipping yourself with the right tools is essential for a smooth installation process. Here’s a list of must-have tools that I recommend:
- Post Hole Digger: Essential for digging deep holes for your fence posts.
- Level: Ensures that your fencing is straight and aligned properly.
- Clamps: Useful for securing panels together during installation.
- Measuring Tape: Accurate measurements are crucial for planning your layout.
Having these tools on hand will enhance your efficiency and help you avoid potential pitfalls during installation. Remember, preparation is key!
Choosing the Right Materials for Your Temporary Fence
When it comes to materials, there are several options suitable for uneven ground. Here's a quick comparison:
| Material | Pros | Cons |
|---|---|---|
| Wood | Natural look, easy to customize | May warp or rot over time |
| Metal | Durable, withstands adverse weather | Can be heavy and difficult to install |
| Wire Mesh | Lightweight, portable, offers visibility | Less sturdy than other options |
Each material has its advantages and disadvantages, so consider your specific needs and the ground conditions when making your choice. At Temporary Fencing Hub, we're committed to helping you make informed decisions!
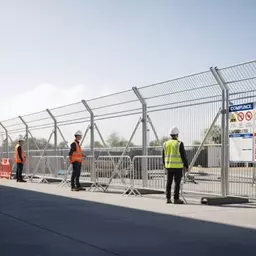
Exploring Different Fencing Types for Temporary Installations
Lastly, let's talk about the various fencing types available for temporary use. Here are a few options you might consider:
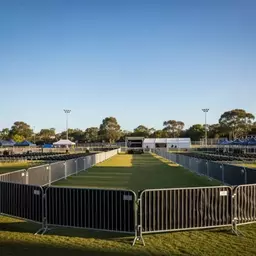
- Portable Fencing: Ideal for events or short-term projects, easy to set up and take down.
- Barrier Fencing: Provides a secure perimeter, often used in construction sites.
- Mesh Fencing: Offers visibility while maintaining safety, great for crowd control.
Each type serves different purposes, so evaluate your project requirements to choose the most suitable option. Remember, the right fencing can enhance both safety and aesthetics!
Frequently Asked Questions About Temporary Fencing on Uneven Ground
- Q: Why is installing temporary fencing on uneven ground challenging?
- A: Uneven ground presents challenges such as stability issues (fences prone to tipping), alignment problems (gaps or overlaps), and soil erosion, which can compromise long-term stability.
- Q: What are the different fencing styles suitable for slopes?
- A: Three main styles are: Stepped Fencing (panels adjusted to slope height, less uniform), Racked Fencing (panels follow contour, consistent height), and Contoured Fencing (customized panels for a seamless look).
- Q: How do different soil types affect temporary fencing installation?
- A: Clay soil retains water, causing instability; sandy soil is prone to erosion and poor post hold; and rocky terrain requires specialized tools for proper anchoring.
- Q: What tools are essential for installing temporary fencing on challenging terrain?
- A: Essential tools include post hole diggers, levels, clamps, and measuring tape to ensure accurate and secure installation.
- Q: Are there specific regulations or permits needed for temporary fencing installations?
- A: Yes, it's crucial to check local council or authority regulations regarding height, material specifications, setback requirements, and safety signage. Permits may be necessary depending on the project's scope and location.
Engage With Us!
Have you ever faced challenges while installing temporary fencing on slopes or uneven ground? We want to hear your experiences! Share your thoughts and tips in the comments below:
Summary of Key Takeaways for Installing Temporary Fencing
As we wrap up our exploration of installing temporary fencing on slopes and uneven ground, it's essential to highlight a few key points. First and foremost, proper planning cannot be overstated. Before you start, take the time to assess the terrain and determine the best fencing style for your needs.
Next, selecting the right materials is crucial. Each option, whether it be wood, metal, or wire mesh, has its advantages and disadvantages, particularly on slopes. Remember, the stability of your fence relies heavily on these choices! Finally, a meticulous installation process is vital. Pay close attention to ensuring your posts are set correctly and your panels are aligned.
- Conduct thorough terrain assessments before installation.
- Choose materials that suit the ground conditions effectively.
- Follow proper installation techniques to enhance stability.
By keeping these takeaways in mind, you can ensure a successful temporary fencing setup that stands the test of time and environmental challenges!
Next Steps and Resources for Your Fencing Project
Ready to take the plunge and start your fencing project? Here's what I recommend as next steps! First, gather all your necessary materials and tools. Make a checklist to ensure you have everything you need before setting out. Remember, having the right tools at your disposal, like clamps and levels, can make a world of difference in your installation process.
Additionally, consider watching some instructional videos that detail the installation process. These can provide a visual reference that may help clarify any uncertainties you might have. Lastly, consult your local regulations regarding temporary fencing. This is crucial to ensure that your installation complies with safety standards, particularly if you're working in construction environments, as highlighted in guidelines such as the Unified Facilities Criteria (UFC) for Security Fences and Gates.
- Make a checklist of materials and tools needed.
- Watch instructional videos for guidance.
- Check local regulations for compliance.
By taking these preparatory steps, you’ll equip yourself for a smooth and efficient project. If you have any questions along the way, feel free to reach out—I’m here to help!
Understanding Safety Regulations and Fencing Permits
When it comes to installing temporary fencing, navigating safety regulations and securing the necessary permits is paramount. Each state in Australia has its own set of regulations that govern fencing installations, especially in construction zones where safety is a top priority. It's vital to familiarize yourself with these guidelines to avoid potential fines and ensure the safety of everyone involved.
Common regulations to consider include:
- Height and material specifications for temporary fences.
- Setback requirements from property lines or public pathways.
- Safety signage that may need to be displayed on-site.
Additionally, obtaining the right permits might be necessary, depending on your project's scope and location. Always check with your local council or authority before proceeding. This not only helps you comply with legal requirements but also promotes a safer environment for your project and its participants!
Recap of Key Points
Here is a quick recap of the important points discussed in the article:
- Conduct thorough terrain assessments before installation to identify challenges posed by slopes and uneven ground.
- Choose materials that suit the ground conditions effectively, such as wood, metal, or wire mesh.
- Follow proper installation techniques to enhance stability and ensure your posts are set correctly and panels are aligned.
- Select the right fencing style (stepped, racked, or contoured) for optimal functionality and aesthetic appeal.
- Be aware of local regulations regarding height, material specifications, and safety signage for compliance.